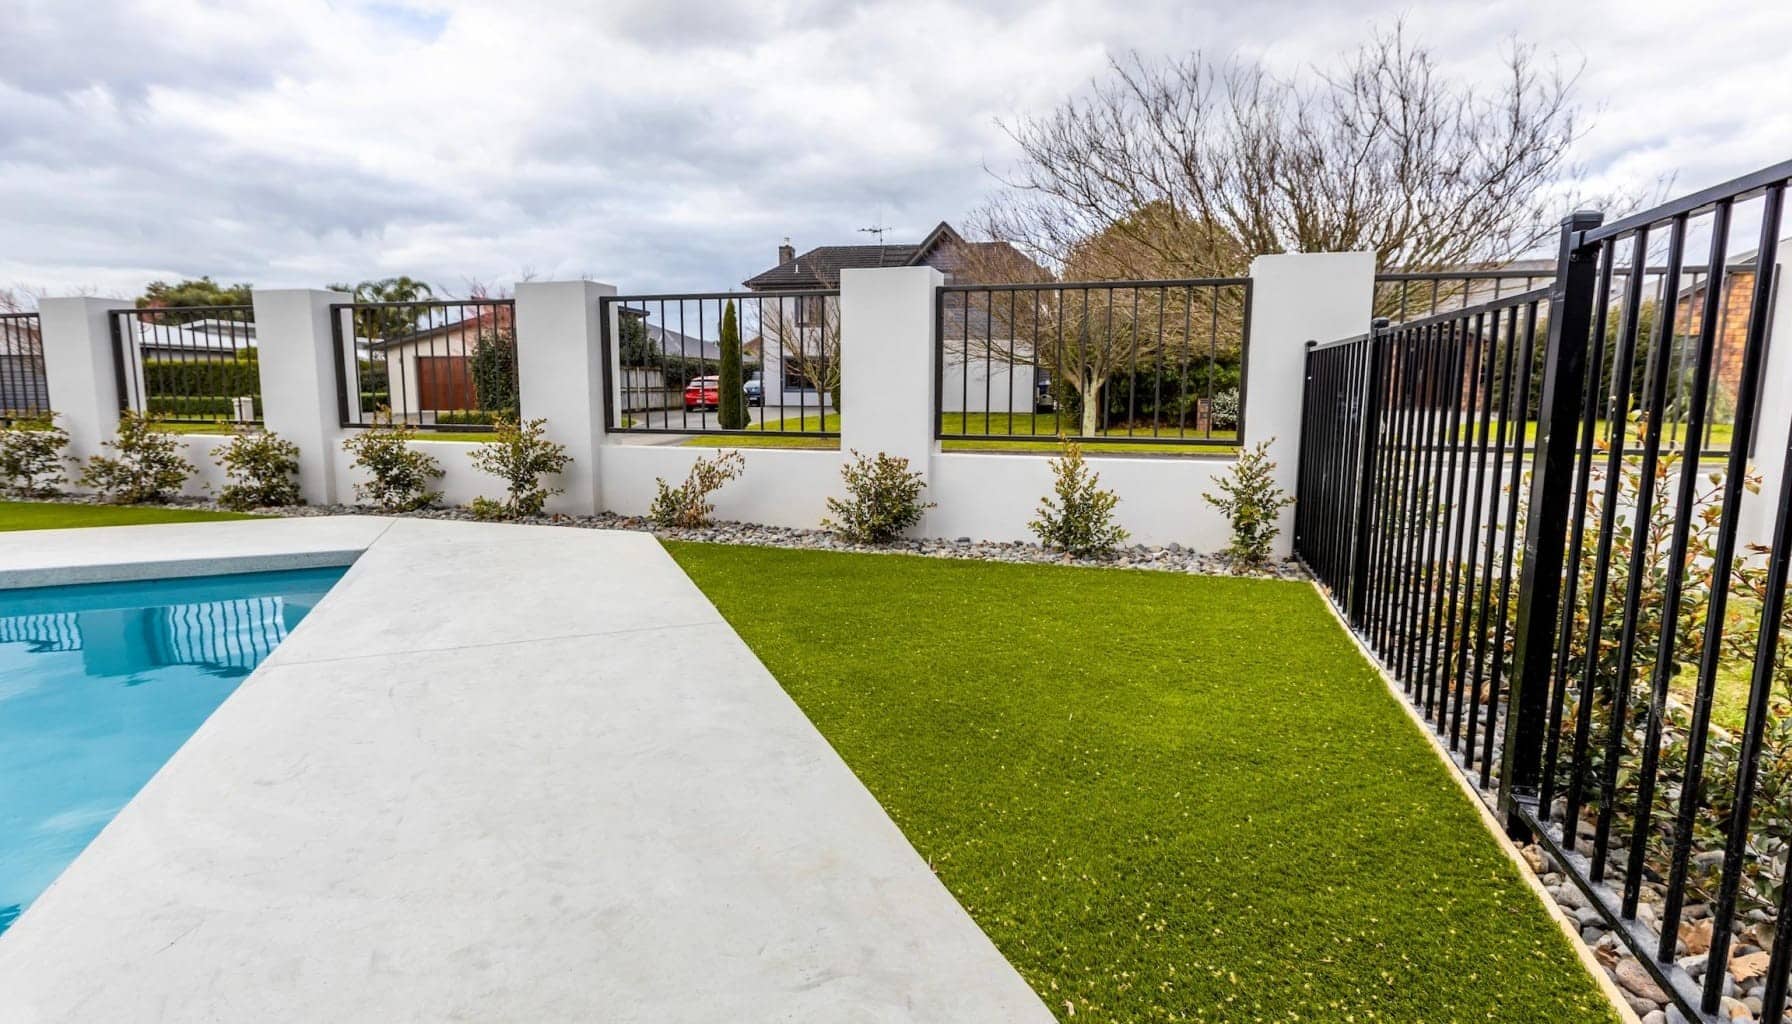
At Unreal Lawns & Courts, we know that installing fake grass can transform your outdoor space. A well-installed artificial lawn offers a lush, green appearance without the hassle of regular mowing and watering.
This guide will walk you through the process of how to install fake grass, from ground preparation to finishing touches. Whether you’re a DIY enthusiast or considering professional installation, these steps will help you achieve a Beautiful, low-maintenance lawn.
How to Prepare Your Ground for Artificial Grass Installation
Clear the Area
Start by removing all existing grass and soil dig down about 100mm to remove all organic material. This prevents future weed growth and provides space for the base materials.
Level and Address Drainage
After clearing, assess the area for any low spots or drainage issues. Use a rake to level the surface, removing any bumps or dips. For areas with poor drainage, consider installing a drainage system.
Create a Stable Base
Add a geotextile cloth and a timber edge around perimeter. Spread a layer of crushed stone Gap/20 over the area. This material provides stability and aids drainage. Use a plate compactor to firmly pack the base. Follow this with a thin layer of Gap/7. Level the Gap/7 with a screed for a perfectly flat surface.
Time Investment Pays Off
A well-prepared base can significantly reduce installation time. It’s a time investment that pays off in the long run, ensuring your artificial grass looks and performs its best for years to come.
With the ground properly prepared, you’re now ready to move on to the next exciting step: laying the artificial grass itself. This process requires precision and attention to detail to achieve a seamless, natural-looking result.
How to Lay Artificial Grass
Unroll and Position the Turf
Begin the installation process by slowly unrolling your synthetic turf over the carefully prepared foundations. Place all pieces of turf on the ground, ensuring the pile direction faces the same way for a uniform look. Allow the grass to settle for a few hours before cutting. This step prevents wrinkles and ensures a smooth finish. Use nails or stapes to attach the turf to the timber edging , about 50mm apart.
Trim with Precision
After the grass settles, it’s time to trim. Use a sharp utility knife to cut the turf to fit your space precisely. Cut slowly and carefully from the back of the turf to avoid damaging the fibres. For curved edges, make a series of small cuts to follow the contour smoothly. Leave a small gap (about 5mm) around fixed objects like trees or paving for expansion.
Secure the Turf
Proper securing of the turf is essential for a long-lasting installation. Start at one end and work your way across. Use nails or stapes to attach the turf to the timber edging , about 50mm apart. For joining sections, use a 300mm joining tape. Add adhesive to the tape, then press the edges of the turf together carefully, ensuring no visible gaps.
Brush the Fibres
After securing the turf, brush the fibres upright using a stiff broom. This step blends the seams and gives your new lawn a natural, freshly-cut appearance. Brushing also helps distribute any infill material evenly (if you choose to use it).
Add Infill
Artificial grass installations benefit from the addition of infill material. This step can enhance the turf’s stability and appearance. Spread a layer of silica sand evenly across the surface, then brush it into the fibres. The infill helps the grass blades stand upright and adds weight to prevent shifting.
With these steps complete, your new artificial lawn is almost ready for use. The next section will cover the final touches and maintenance tips to keep your lawn looking its best for years to come.
Perfecting Your Artificial Lawn
Brush for a Natural Look
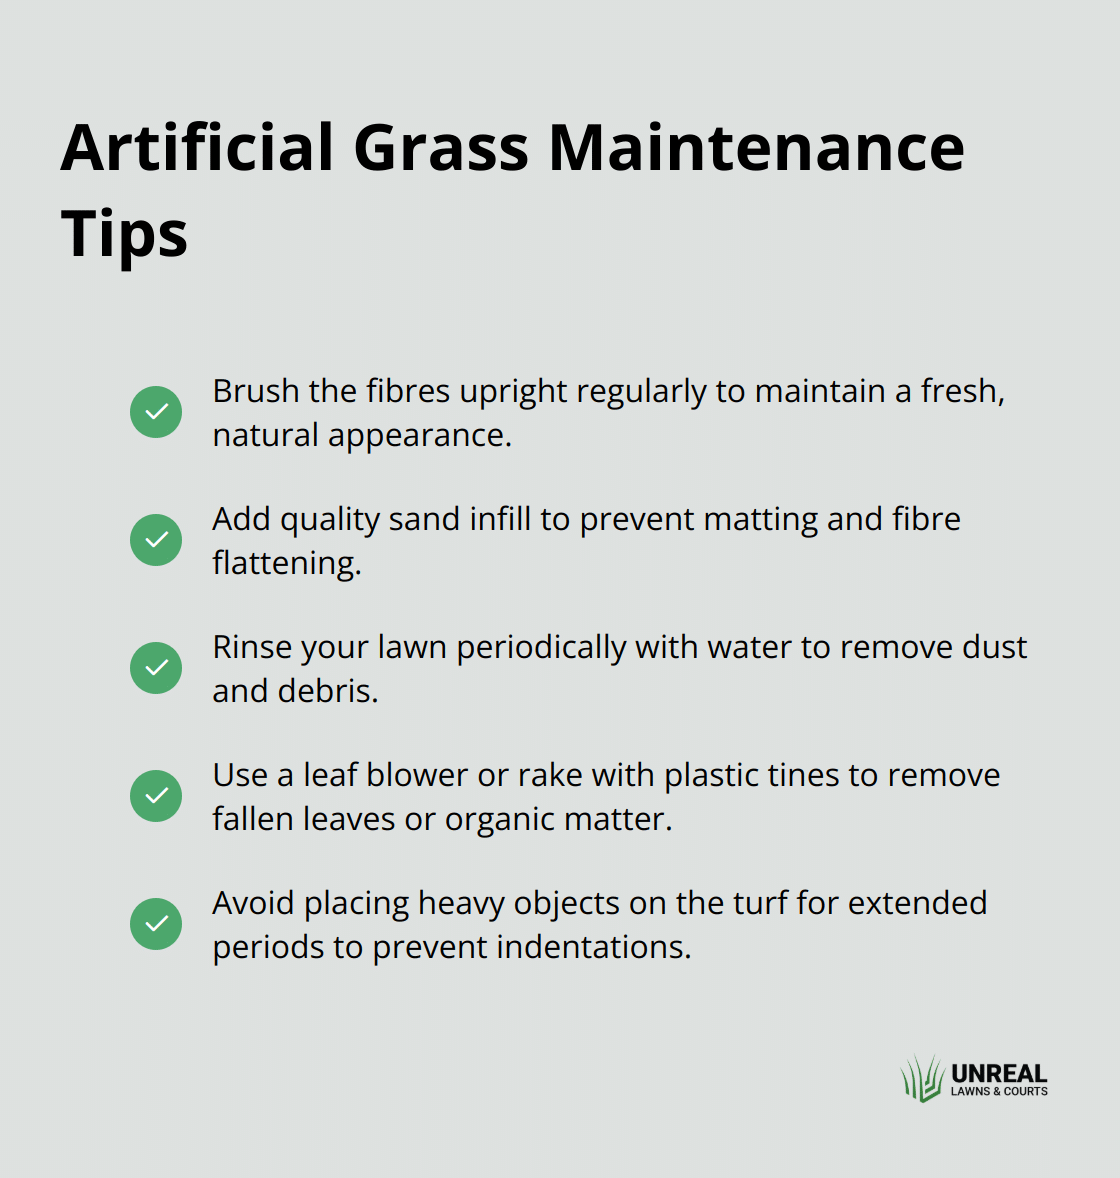
After you secure your artificial grass, give it a fresh, natural appearance. Use a stiff-bristled broom or a power brush to sweep the fibres upright. This step blends any visible seams and creates a uniform, just-mowed look. Brush the grass fibres upright to remove any excess debris and help distribute the infill evenly. This process also helps maintain the fresh look of your turf with minimal effort.
Maintain for Longevity
Artificial grass requires less maintenance than natural turf, but some regular care will keep it looking its best. Rinse your lawn periodically with water to remove dust and debris. Areas with heavy foot traffic or pet use may need more frequent rinsing or a deodoriser. Use a leaf blower or plastic rake to remove fallen leaves or other organic matter. For stubborn stains, apply a mixture of mild soap and warm water with a soft brush.
Protect from Damage
While artificial grass resists most types of damage, it’s not indestructible. Don’t place heavy objects on the turf for extended periods, as this can cause permanent indentations. Keep hot items (like grills or fire pits) off the grass to Prevent melting. These simple precautions will help maintain your lawn’s Pristine appearance for years to come.
Final Thoughts
Installing fake grass transforms outdoor spaces into low-maintenance, attractive areas. The process requires careful ground preparation, precise turf laying, and meticulous finishing touches. A well-installed artificial lawn provides a lush, green appearance year-round without the need for regular mowing, watering, or fertilising (saving time and resources).
Professional installation ensures optimal results when you want to install fake grass. At Unreal Lawns, we offer premium artificial grass solutions for residential and commercial spaces across New Zealand. Our team combines aesthetics with functionality, providing top-quality, weather-resistant turf that stays lush in all seasons.
Unreal Lawns delivers Beautiful, hassle-free outdoor spaces for backyards, pet areas, schools, playgrounds, and sports fields. Our synthetic turf eliminates traditional lawn maintenance while withstanding heavy use and harsh conditions. Choosing Unreal Lawns means investing in a durable, attractive solution that enhances your property and lifestyle.


