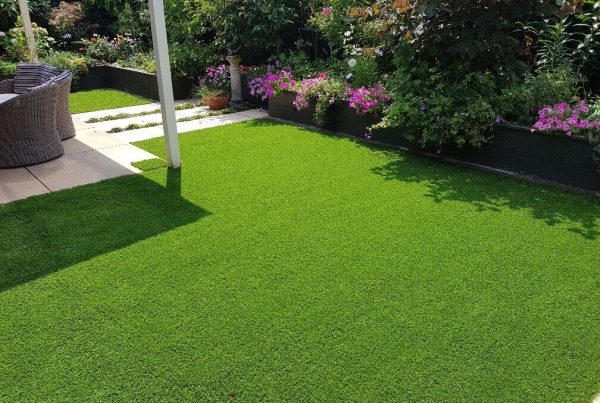
At Unreal Lawns & Courts, we know that learning how to install synthetic turf can be a game-changer for your outdoor space.
A well-installed artificial lawn not only looks great but also saves time and money on maintenance.
In this guide, we’ll walk you through the professional steps to achieve a flawless synthetic turf installation.
How to Prepare Your Ground for Synthetic Turf Installation
Clear the Existing Landscape
The first step in preparing your ground for synthetic turf is to remove all existing grass and vegetation. Use a sod cutter or digger efficiently strip away grass and weeds to 100mm. For smaller areas, a shovel & wheelbarrow will suffice.
Compact the Soil
The final step in ground preparation is soil compaction. This process creates a stable base that prevents settling and extends the life of your synthetic turf. Rent a plate compactor from your local hardware store for best results. Make several passes over the entire area, paying extra attention to spots that feel soft underfoot.
For larger areas or particularly challenging soil conditions, professional help might be necessary. Specialised equipment can achieve optimal compaction levels, ensuring your turf stays level for years to come.
How to Create the Perfect Base for Your Synthetic Turf
Install the Geotextile Cloth
Start by rolling out a high-quality geotextile cloth across the entire area. This creates a separation between your artificial grass base and the soil/ clay underneath stoping the two mixing together. Overlap the edges by at least 100mm and secure them with landscape staples. Install a timber edge around the perimeter 15 to 20mm below any paths or mowing trips. This is to attach the Synthetic grass to late.
Add the Crushed Stone Layer
Next, add a layer of crushed stone or gravel. This layer acts as the primary drainage system for your synthetic lawn. Use GAP/20, a type of gravel, to create a firm base for the turf. Distribute the stone evenly with a rake, then compact it carefully with a plate compactor to ensure its longevity and prevent shifting over time. Make several passes to create a firm, stable base.
Final Layer
The final touch to your base is a layer of Gap/7. This provides a smooth surface for the turf. Apply a 20mm layer Gap/7. Spread it evenly to the top of your timber edging with a levelling rake, then dampen the base slightly with water. Compact this layer as well, using the plate compactor.
Maintain Proper Grading
Maintain a slight grade away from buildings or structures to ensure proper water runoff. Use a level frequently throughout this process to check for any low spots or inconsistencies. Taking the time to perfect your base now will result in a smoother, more professional-looking synthetic lawn that lasts for years.
How to instal Synthetic Turf Perfectly
Unroll and Position the Turf
Unroll your synthetic turf across the prepared base. Allow the turf to acclimatise to its new environment for at least an hour before installation. This step prevents wrinkles and ensures the turf lays flat. Position the turf so that the blades face towards the main viewing area (typically your house). This orientation creates a more natural look.
When laying multiple rolls, ensure they all face the same direction to maintain a uniform appearance. Butt the edges of each roll tightly together, but avoid overlapping them. Any gaps between rolls will be noticeable and detract from the overall look.
Cut and Shape for a Perfect Fit
After positioning, trim the turf to fit your space precisely. Use a sharp utility knife or carpet cutter for clean, straight cuts. Always cut from the back of the turf to protect the fibres. When cutting around obstacles like trees or garden features, make relief cuts towards the object, then trim away the excess.
For curved edges, use chalk to mark your cutting line, then carefully follow it with your knife. Take your time with this step – rushing can lead to mistakes that are difficult to correct later.
Secure the Edges
After cutting, secure the edges of your turf to the timber edging using stainless steel staples or galvanised nails prevent lifting and shifting.
Add Infill for Stability and Realism
The final step on how to install synthetic turf involves adding infill material. This not only provides stability to the turf fibres but also adds weight to keep the turf in place and enhances its realistic appearance. The most common infill materials are silica sand.
Spread the infill evenly across the turf using a drop spreader. Try to apply about 10-15 kilograms of infill per square metre of turf. After spreading, use a power broom or stiff brush to work the infill down into the fibres. This process helps the turf blades stand upright and creates a more natural look.
Brush the turf regularly in the first few weeks after installation. This action settles the infill and trains the fibres to stand upright. With proper installation and care (including regular brushing), your synthetic turf will provide a beautiful, low-maintenance lawn for years to come.
Final Thoughts
Installing synthetic turf transforms outdoor spaces into beautiful, low-maintenance areas. The process requires careful ground preparation, precise turf laying, and proper infill application to ensure longevity and performance. Professional installation services offer expertise, specialised tools, and in-depth knowledge for optimal results in complex environments.
Unreal Lawns & Courts provides top-quality synthetic turf solutions and professional installation services across New Zealand. Our team combines expertise with premium materials to create stunning, durable outdoor spaces (including residential backyards, commercial properties, and sports fields). A well-installed synthetic lawn enhances aesthetic appeal and saves time and resources in the long run.
Learning how to install synthetic turf can be a rewarding DIY project. However, professional installation ensures optimal results, especially for challenging spaces. The investment in proper installation pays off with a lush, green lawn that requires minimal upkeep year-round.


